How to create an Email Workflow?

Indira
Last Update há 2 anos
When a customer makes an appointment in your store, it's a bonus if you have an email workflow system that keeps you and your customer informed about the appointment.
The workflow system helps you to set your email workflow based on different event types.
Let's see how this works step by step.
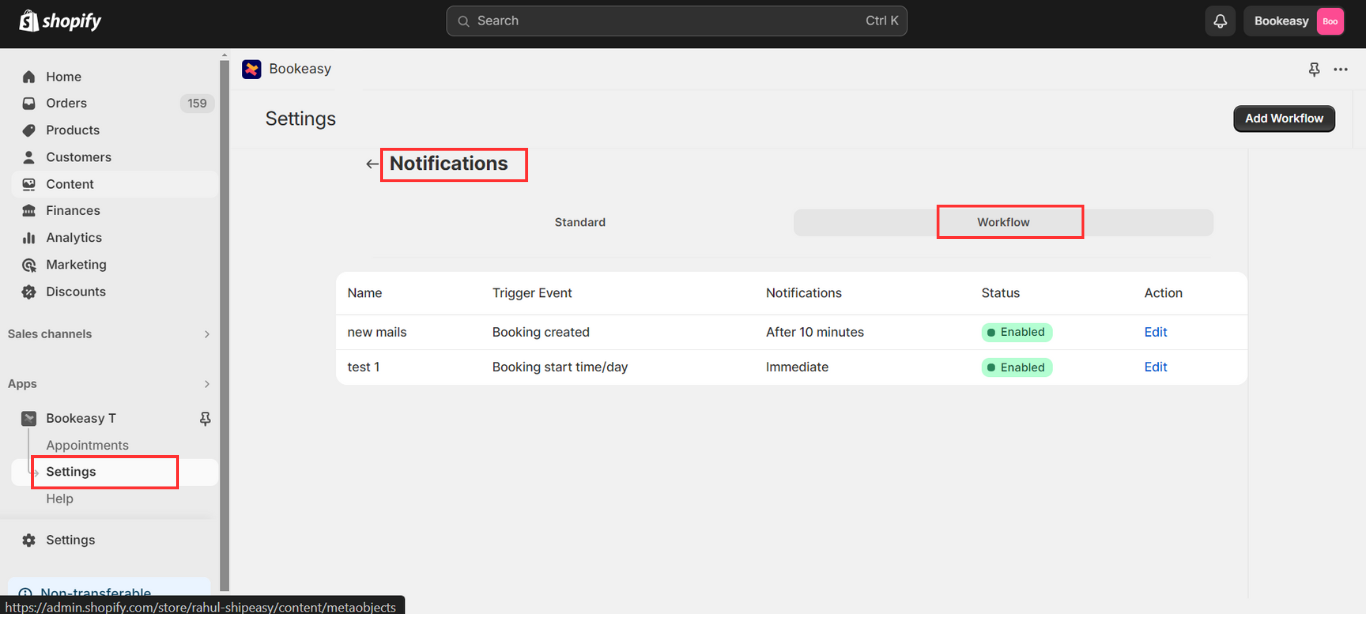
1. Navigate to the settings section of the app.
2. Click on Notifications.
3. You will see an option that says "Standard" and " Workflow"
4. Click on "Workflow"
5. Then click on "Add workflow", to start customizing your email workflows.
Once you click on "Add workflow", there are two segments to complete the setup of the email workflow.
1. General Workflow Setup
2. Notification setup
General workflow setup
1. Workflow Name
Give a name to the email workflow that you want to create. This is for internal reference only.
2. Trigger Event Type
There are 5 different trigger event types that you can choose from.
Based on the "trigger event type" that you choose, the "trigger options" in the notification set up section will vary.
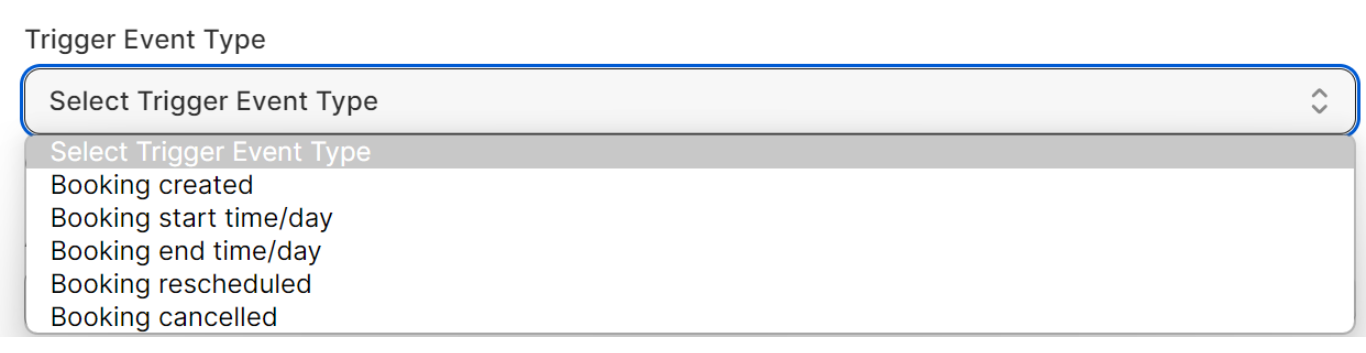
- Booking Created: When a booking is created, an email will be sent to you and the customer. You can choose to send this email either immediately or at a later time.
- Booking Start time/day: An email will be sent to both you and the customer at the start time of the booking. For example, if the appointment is at 10:00 AM, you can choose to send the email immediately, before, or after the 10:00 AM.
- Booking End time/day: An email will be sent to both you and the customer at the end of the booking. For example, if your appointment ends at 11:00 AM, you can choose to send the email immediately, before, or after 11:00 AM.
- Booking rescheduled: If the booking is rescheduled, an email will be sent to both you and the customer. For example, if a customer reschedules an appointment from 11:00 AM to 10:00 AM, you can choose to send the email immediately (by 10:00 AM) or sometime after 10:00 AM.
- Booking cancelled: If the booking is canceled, an email will be sent to both you and the customer. You can choose to send the email immediately after the cancellation or at a later time.
3. Add appointments: This section allows you to add all the services for which you would like to set up an email workflow.
- Click on "Browse".
- Choose the services which are relevant to the "Trigger event type" that you have selected.
- Then click on "Add".
NOTE: You will not be able to add an appointment and trigger type that already exists.

You can add up to 10 workflows in your store.
Notification Setup:
- Click on "Add notification" to start your customization.
- As mentioned earlier, the "Trigger options" varies depending on the "Trigger event type" that you chose in the "General Setup" section.
- Now choose the "Trigger time". This can be in days, hours or minutes.
- Next add your recipient email address.
- Add the subject for your email. This can be customized based on your "Trigger event type".
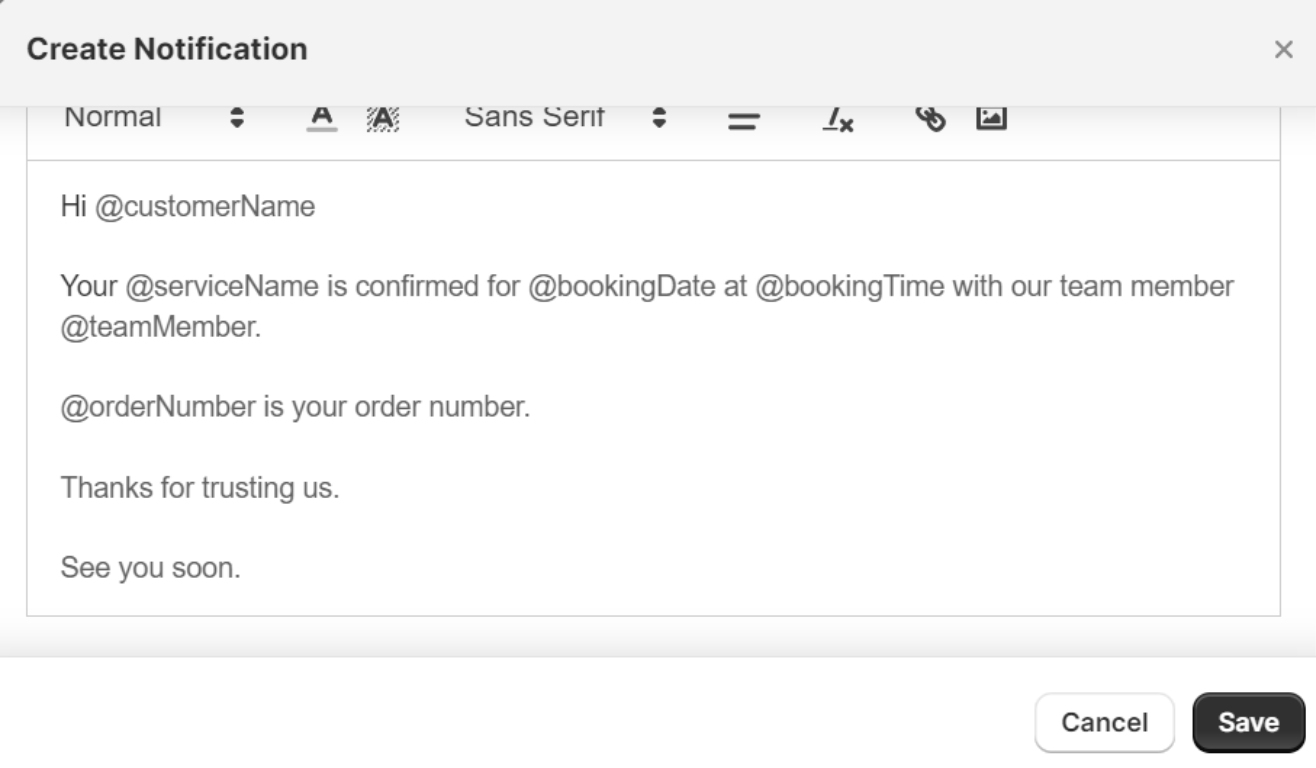
- Create the body of the email to be sent.
- Use the tags which are given below the box. Please note that these are case sensitive.
Below is a sample of how you can use this section to customize your email.
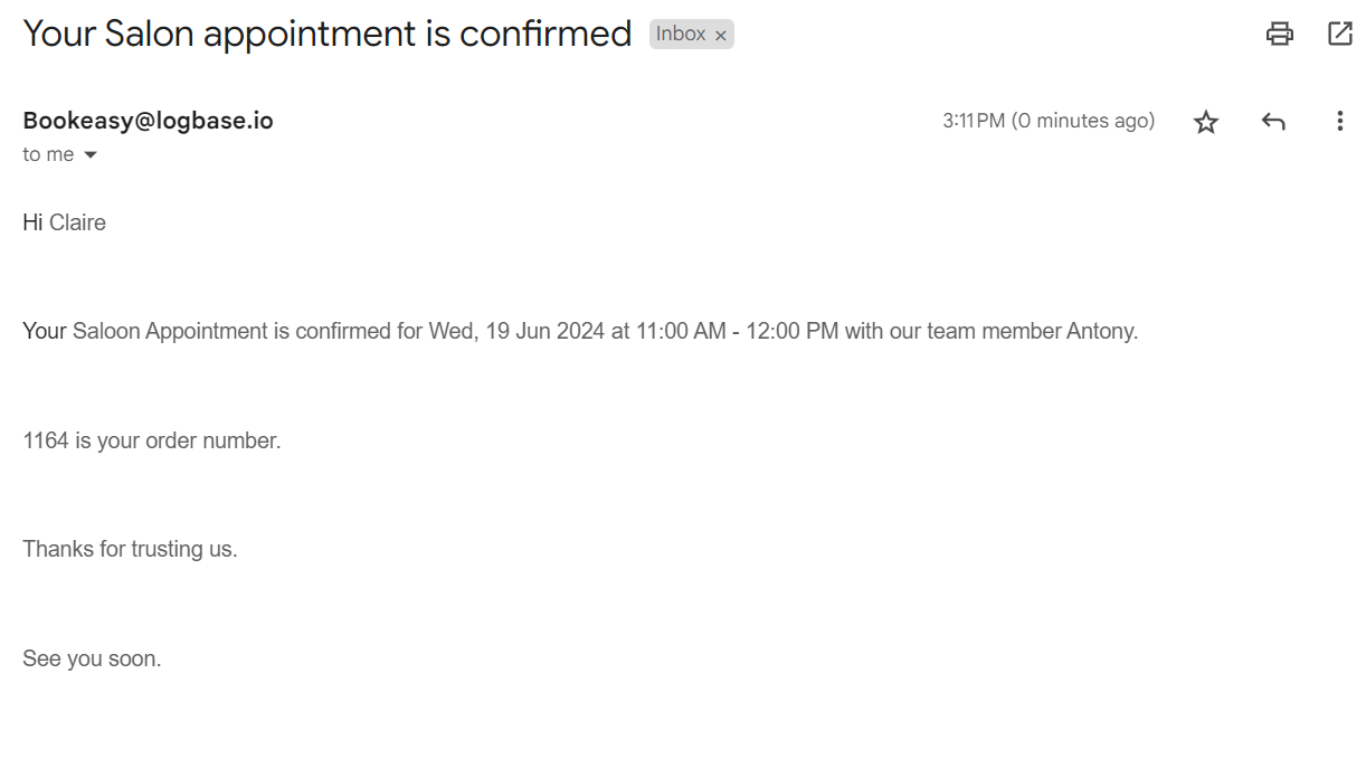
The below image shows the triggered email.
This is how you can set up an email workflow with different "Trigger event types". For any more queries on how to set this up, get in touch with our success team at [email protected]